Thinking about swapping your stock bulbs for LED? You’re not alone. LED lights burn brighter, use less power and look modern. The good news is you don’t need a garage full of tools or a mechanic’s degree. In the next few minutes you’ll walk away with a clear plan, a basic parts list and the confidence to finish the job yourself.
First, gather the essentials. Most LED kits include the bulbs, a small heat‑sink and a pair of connectors. You’ll also want a set of screwdrivers (flat‑head and Phillips), a socket wrench for removing the old housing, and some electrical tape. A multimeter helps you check voltage, but it’s optional. If your car has a CAN‑bus system, grab a CAN‑bus decoder or a couple of load‑resistors – they stop the dashboard from flashing the “bulb out” warning.
1. Disconnect the battery. Safety first. A quick 10‑second disconnect prevents any short circuits while you work on the wiring.
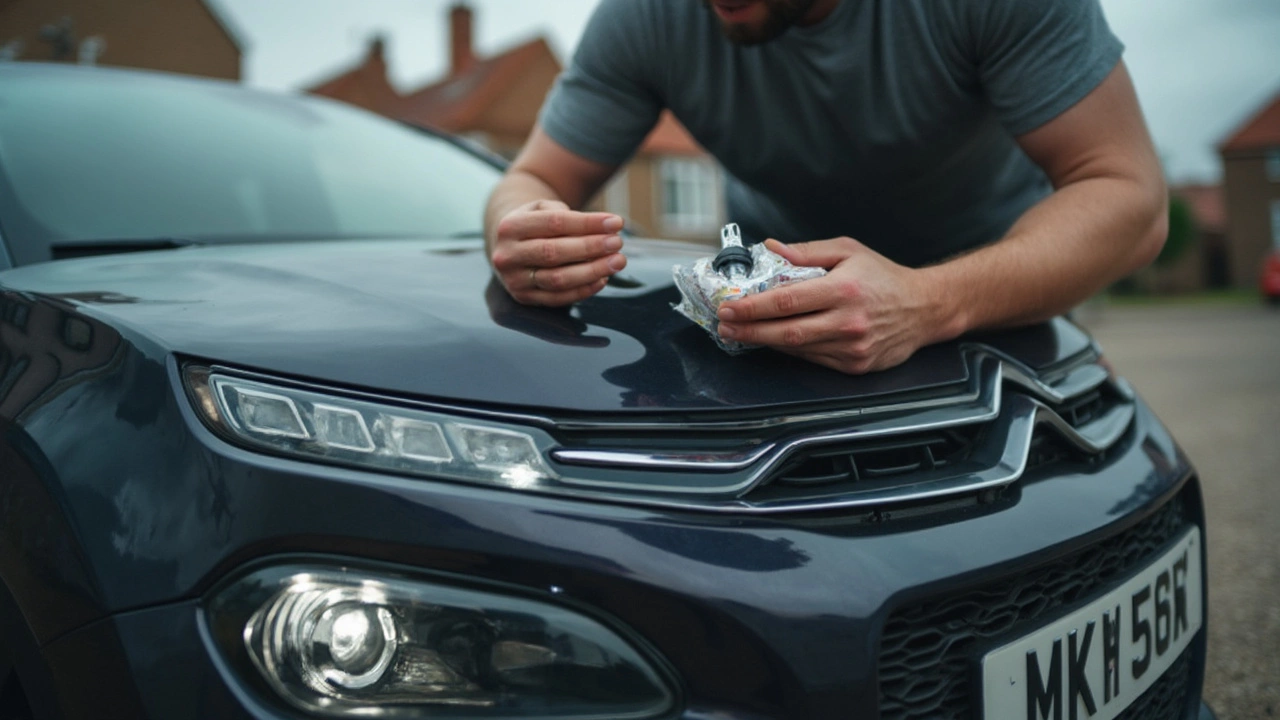
2. Remove the old bulb. Locate the headlight or tail light housing, twist the retaining clips, and pull the bulb out. Some cars have a plastic cover you’ll need to pop off first.
3. Check the connector. Look at the plug that the old bulb used. If it’s a simple two‑pin plug, you can usually plug the LED straight in. If it’s a three‑pin or a CAN‑bus plug, attach the load‑resistor or decoder before the LED.
4. Install the LED. Slide the new LED into the housing, making sure it sits flush. Tighten any retaining clips you removed earlier. Don’t force it – LED bulbs are fragile.
5. Reconnect the battery and test. Turn the lights on. If everything looks bright and the warning light stays off, you’re good to go. If the dash still flashes, double‑check your load‑resistor or try a different LED brand – some cars are picky about the resistance they expect.
6. Seal the housing. Snap the plastic cover back on and make sure the seals are tight. This keeps moisture out, which can damage the LED over time.
That’s it – a full LED conversion in under an hour. Most people find the biggest surprise is how little heat the LEDs produce. That means your headlights stay clear longer and you won’t have to replace them as often.
After you finish, take a quick drive at night. Notice how the road looks clearer and how other drivers react to the brighter light. If you’re happy with the look and performance, consider upgrading the rest of your vehicle’s bulbs – taillights, fog lights and interior LEDs all follow the same basic steps.
Remember, every car is a little different. If you hit a snag, a quick search for "[your car make] LED conversion" usually pulls up a forum thread with model‑specific tips. Staying patient and double‑checking connections will save you time and avoid a burnout.
Thinking about swapping your factory headlight bulbs for LEDs? This article breaks down whether it’s possible, what you’ll need, and the real-world pros and cons. We tackle rules, compatibility, installation steps, and potential legal headaches. You’ll find shortcuts, common mistakes, and practical tips to help you do it right or decide if it’s worth the hassle. Make sure you light the road safely and stay on the right side of the law.