Cheapest Car Lowering Method Calculator
Recommended Lowering Methods
Summary
Rubber Blocks
Simple steel or rubber pads placed under the springs. Ideal for small drops with minimal cost.
Lowering Springs
Stock springs replaced with shorter, stiffer versions. Offers more noticeable drop.
Drop Spindles
Machined knuckles that sit lower on the hub. Maintains original spring characteristics.
Polyurethane Bushings
Replace rubber bushings to tighten suspension geometry. Improves handling precision.
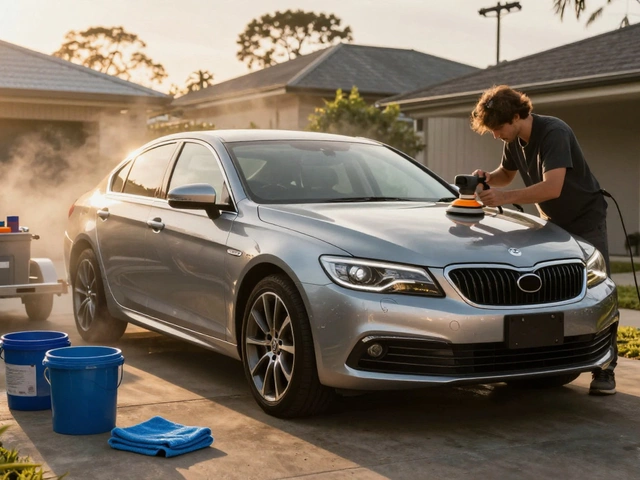
Ever glance at a sleek, close‑to‑the‑ground ride on the street and wonder how you could get that look without blowing your savings? Cheapest car lowering is totally doable - you just need the right tricks, a bit of elbow grease, and a clear plan.
Car lowering is the process of reducing a vehicle's ride height to improve handling, stance, and visual appeal. While high‑end coilovers or air‑suspension kits dominate the market, there are surprisingly cheap alternatives that still give you a respectable drop.
What You’re Really Trying to Achieve
- Sharper cornering thanks to a lower centre of gravity.
- A more aggressive stance that turns heads.
- Better aerodynamics with reduced frontal area.
Understanding the goal helps you pick a method that hits the sweet spot between cost, safety, and drivability.
Top 5 Cheapest Methods Explained
- Rubber blocks - simple steel or rubber pads placed under the springs.
- Lowering springs - stock springs replaced with shorter, stiffer versions.
- Drop spindles - machined knuckles that sit lower on the hub.
- Polyurethane bushings - replace rubber bushings to tighten suspension geometry.
- DIY weight reduction - strip non‑essential interior parts to lower overall mass.
Each approach costs under $300 in most Australian markets and can be installed with basic hand tools.
Method Deep‑Dive: Rubber Blocks
Rubber blocks sit between the coil spring and the strut mount, effectively shortening the spring’s free length. They’re cheap (often $20‑$40 per corner) and reversible - just pop them out if you want stock height again.
Pros:
- Lowest upfront cost.
- Easy DIY - no need for a lift.
- Minimal impact on ride quality if you choose a soft compound.
Cons:
- Limited drop - typically 10‑15mm.
- May cause slightly harsher ride if too stiff.
- Not ideal for aggressive track use.
For most street‑driven cars in Brisbane, rubber blocks give that “lowered” look without compromising comfort.
Method Deep‑Dive: Lowering Springs
These are pre‑stretched springs cut to a shorter length, usually offering a 20‑30mm drop. Prices range from $80 to $150 per set, depending on brand and spring rate.
Installation requires removing the wheels, unbolting the strut assembly, and swapping the springs. If you’re comfortable with a basic jack and a socket set, it’s a Saturday‑day job.
Pros:
- More noticeable drop than rubber blocks.
- Better handling thanks to increased spring stiffness.
- Relatively inexpensive compared to coilovers.
Cons:
- Harder ride - especially on rough Brisbane streets.
- May require a wheel alignment afterwards.
- Potential for premature wear on bushings if they’re still rubber.

Method Deep‑Dive: Drop Spindles
Drop spindles are machined to sit lower on the hub, giving a drop of 15‑25mm without altering spring rates. They’re a bit pricier than springs - around $120‑$180 per pair - but they keep ride comfort intact.
Installation is more involved: you need to detach the steering knuckle, press the spindle out, and bolt the new one in. Many DIYers use a press kit or send it to a local garage.
Pros:
- Maintains original spring and damper characteristics.
- Provides a solid, permanent drop.
- Great for front‑end aesthetics (wheel tuck‑in).
Cons:
- Higher tool requirement - press or professional help.
- Potential impact on steering geometry; alignment is a must.
Method Deep‑Dive: Polyurethane Bushings
Switching from rubber to polyurethane bushings reduces suspension flex, effectively lowering the car’s ride height by 5‑10mm after a short break‑in. A full set for front and rear can cost $100‑$200.
The process involves removing each bushing, pressing in the new one, and reinstalling the components. It’s a bit messy but doable with a bushing press and a little patience.
Pros:
- Improves handling precision.
- Durable - lasts longer than rubber.
- Small drop adds up when combined with other cheap methods.
Cons:
- Harder ride on rough surfaces.
- Higher upfront cost than rubber blocks.
- May transmit more road noise into the cabin.
Method Deep‑Dive: DIY Weight Reduction
While not a suspension tweak, shedding unnecessary weight (e.g., rear seats, sound deadening, heavy spare) lowers the centre of gravity. In a typical 4‑seat sedan, you can lose 30‑50kg for under $50 in labor.
Less weight means the car sits naturally lower under load, especially when paired with softer springs. Just watch out for legal requirements - some removals may affect roadworthiness.
Cost‑Benefit Comparison Table
| Method | Typical Cost (AUD) | Drop Achieved | Ride Comfort | Installation Difficulty |
|---|---|---|---|---|
| Rubber blocks | $20-$40 | 10-15mm | Good | Easy (no lift) |
| Lowering springs | $80-$150 | 20-30mm | Moderate | Medium (jack & socket set) |
| Drop spindles | $120-$180 | 15-25mm | Good | Hard (press or garage) |
| Polyurethane bushings | $100-$200 | 5-10mm | Firm | Medium (bushing press) |
| DIY weight reduction | $30-$50 | Variable (depends on kg removed) | Neutral | Easy (hand tools) |
Step‑by‑Step DIY Guide: Installing Rubber Blocks
- Park the car on a flat surface and engage the handbrake.
- Loosen the rear wheel lug nuts just enough to move the wheel.
- Jack up the rear axle and support it with a jack stand.
- Remove the wheel and locate the strut mount where the spring sits.
- Slide a rubber block onto the spring, ensuring it sits evenly on both sides.
- Re‑mount the wheel, torque the lug nuts to the manufacturer’s spec (usually 100Nm for most Aussie sedans).
- Lower the car, then repeat on the opposite side.
- Take the car for a short drive and check for any rubbing or uneven stance.
- Finally, have a local garage perform a quick alignment - a 0.1° difference can cause tire wear.
That’s it - you’ve saved $30 and shaved off 12mm of ride height.

When to Skip the Cheap Route
If you plan to hit the track regularly, or you haul heavy loads (like a caravan), the ultra‑budget methods may compromise safety. In those cases, investing a bit more in a quality coilover kit or adjustable air‑suspension pays off in durability and tunability.
Common Pitfalls & How to Avoid Them
- Forgotten alignment: Even a cheap drop will mis‑align the front wheels. Always get an alignment after any ride‑height change.
- Uneven drops: Installing blocks on one side only leads to wobble. Double‑check measurements before tightening.
- Clearing the wheel wells: Some cars have limited clearance; a 30mm drop might cause tire rub. Measure clearances with a ruler before buying parts.
- Legal limits: In Queensland, the front ride height cannot be more than 30mm lower than the manufacturer's spec. Keep documentation of your original specs just in case.
Quick Checklist Before You Start
- Know your car’s original ride height (owner’s manual or manufacturer spec).
- Choose a method that fits your budget and skill level.
- Gather tools: jack, stands, socket set, torque wrench, bushing press (if needed).
- Plan for an alignment - budget $80‑$150.
- Check local regulations regarding modifications.
Frequently Asked Questions
Will rubber blocks damage my springs?
No, rubber blocks are designed to sit on the spring without compressing it. They simply act as a spacer, so the spring’s coil rate stays the same.
Do I need new shocks when I lower my car?
It depends on how much you drop. A modest 10‑15mm drop with rubber blocks usually doesn’t demand new shocks. For a 30mm drop using lowering springs, stiffer shocks are recommended to control the increased spring rate.
Can I combine two cheap methods?
Absolutely. Many enthusiasts pair rubber blocks with polyurethane bushings and a light weight reduction to achieve a 20‑25mm total drop without spending a fortune.
Is a lowered car safe on wet roads?
Lowering can improve cornering grip, but if the suspension becomes too stiff you may lose compliance over bumpy, wet surfaces. Keep the drop modest and retain some compliance with softer bushings if you drive in rainy Brisbane conditions.
Do I need to inform my insurer after lowering?
Most insurers consider suspension modifications a change in risk profile. It’s best to notify them; failure to do so could affect a claim if the modification is deemed a factor.
Final Thoughts
If you’re after the look and a marginal handling boost without draining your wallet, start with rubber blocks or a set of budget lowering springs. Upgrade to drop spindles or polyurethane bushings only if you need extra drop or sharper response. Remember, the cheapest route works best when you follow the checklist, get a proper alignment, and stay within Queensland’s legal limits. Happy lowering!