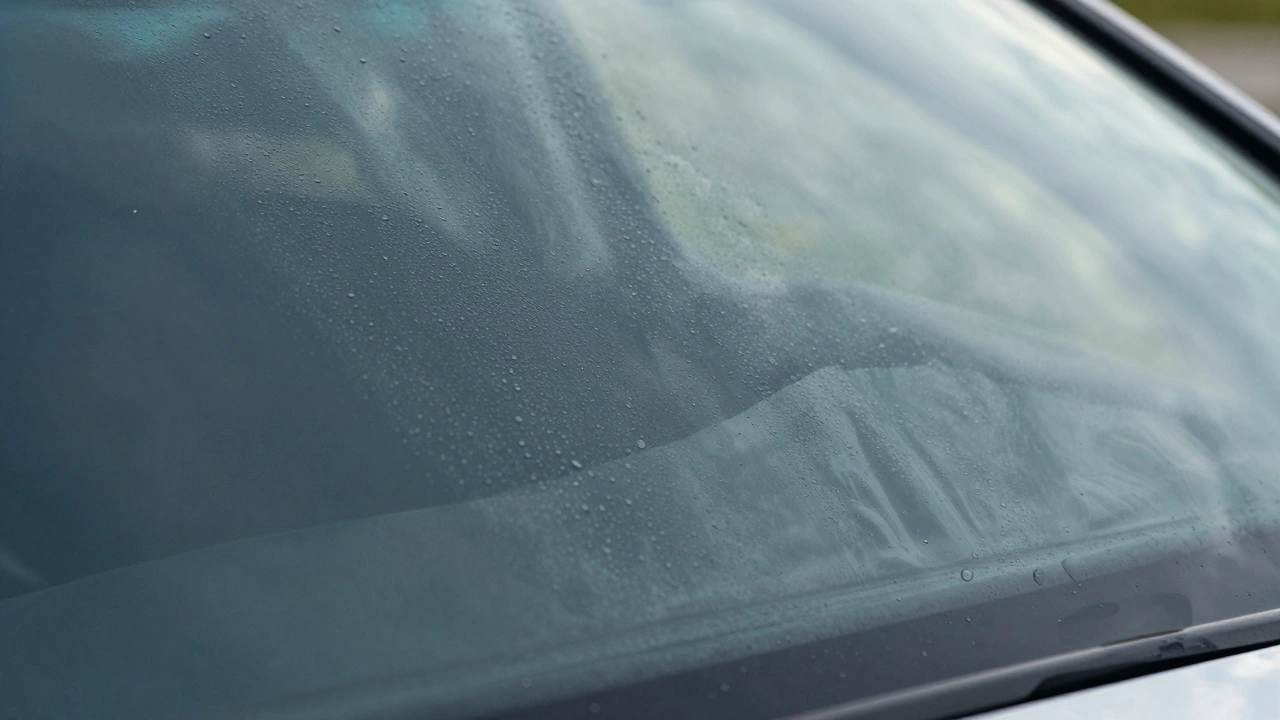
You just got your windows tinted. The shop looks great from the outside, but when you look inside, you might see small water spots, hazy patches, or tiny bubbles. It’s easy to panic and think the job was done wrong. But here’s the truth: that’s usually normal. Freshly applied window film is a thin polyester layer adhered to glass with a pressure-sensitive adhesive and activated by heat and moisture. It needs time to dry and bond properly. This process is called curing.
Knowing when your tint is fully cured saves you from unnecessary stress and prevents accidental damage during the critical drying phase. If you rush the cleaning process or roll down your windows too soon, you can ruin the installation. So, how do you know when it’s ready? Let’s break down the timeline, the visual signs, and what you should (and shouldn’t) do while waiting.
The Science Behind the Cure
Window tint isn’t like paint that dries to the touch in an hour. It works differently. During installation, a soapy water solution is sprayed between the glass and the film. This allows the installer to slide the film into place perfectly. Once positioned, they squeegee out most of the liquid. However, some moisture remains trapped at the edges and within the adhesive layer.
Curing happens as this remaining water evaporates. Heat speeds up the process. In Brisbane, where temperatures often sit above 25°C (77°F), the evaporation rate is faster than in cooler climates. Sunlight hitting the glass acts like a natural heater, pulling the moisture out through the porous edges of the film. As the water leaves, the adhesive bonds tightly to the glass, eliminating haze and lifting any minor imperfections.
| Factor | Impact on Curing | Typical Duration Adjustment |
|---|---|---|
| Temperature | Higher temps speed up evaporation | +/- 3-5 days based on season |
| Sunlight Exposure | Direct sun heats the glass and film | Faster cure if parked outdoors |
| Film Type | Darker films hold more moisture | Dark tints take longer than light ones |
| Humidity | High humidity slows evaporation | Can add 1-2 weeks in rainy seasons |
Visual Signs Your Tint Is Still Drying
If you’re unsure whether your tint is ready, look closely at the glass. Here are the tell-tale signs that the curing process is still underway:
- Water Spots or Cloudiness: You’ll see small, cloudy patches or droplet-like marks. These aren’t dirt; they’re trapped water pockets. They often look worse in direct sunlight because the light refracts through the moisture.
- Tiny Bubbles: Small air or water bubbles may appear near the edges or corners. Unlike large bubbles caused by poor installation, these micro-bubbles will shrink and disappear as the water evaporates.
- Hazy Appearance: The overall view through the window might look slightly foggy or milky. This clarity improves significantly once the adhesive sets completely.
- Loose Edges: In rare cases, you might notice a slight lift at the very edge. Don’t touch it! If it’s due to moisture, it will seal itself. Picking at it creates a permanent gap.
A common mistake people make is trying to clean these spots immediately. Rubbing a wet cloth over uncured tint pushes water deeper into the adhesive, making the problem worse. Patience is your best tool here.
How Long Does It Actually Take?
There’s no single answer, but there are reliable ranges. Most professional installers give a standard window for curing. Here’s what you can expect based on real-world conditions:
- Standard Range: 3 to 7 days for lighter films in warm weather.
- Extended Range: 2 to 4 weeks for dark, high-performance ceramic or carbon films, especially in humid or cooler conditions.
- Brisbane Context: With our subtropical climate, summer installations often cure in under a week. Winter or rainy periods might stretch it to three weeks.
If you live in a place with extreme humidity or cold temperatures, don’t be surprised if it takes closer to four weeks. The key is consistency. If the bubbles are shrinking day by day, you’re on track. If they stay the same size or grow, contact your installer.

What To Do While Waiting
The curing period is a waiting game, but you can help the process along. Here’s how to protect your new tint:
- Park in the Sun: Whenever possible, park your car facing south (in the Northern Hemisphere) or north (in the Southern Hemisphere) to maximize sun exposure. The heat accelerates evaporation.
- Keep Windows Up: Do not roll down your windows for at least 48 hours, ideally 3-5 days. Rolling them down bends the film before it’s bonded, causing peeling or creasing.
- Avoid Cleaning: Skip washing the interior of the windows entirely during the first week. If you must clean the exterior, use a soft sponge and avoid spraying water directly onto the tinted edges.
- Use Gentle Wipers: If you need to use windshield wipers, ensure the blade rubber is clean and soft. Old, hard blades can scratch the film.
One thing many owners overlook is the rear defroster lines. On rear windows, the heating elements are embedded in the glass. Running the defroster too early can cause uneven heating, leading to bubbling. Wait at least one week before using the rear defrost function.
When to Call Your Installer
Not every issue is part of the curing process. Sometimes, things go wrong. Contact your installer if you notice:
- Large Bubbles: Bubbles bigger than a pinhead that don’t shrink after two weeks are likely air trapped during installation, not water.
- Purple Fading: Cheap dyed films can turn purple over time. This isn’t a curing issue; it’s material failure. High-quality carbon or ceramic films resist fading.
- Peeling Edges: If the film lifts significantly and doesn’t reseal after a few days, the adhesive failed or the edges weren’t trimmed correctly.
- Scratches: Deep scratches won’t heal. Minor surface scuffs might fade, but deep gouges require repair or replacement.
Most reputable shops offer a warranty that covers defects in materials and workmanship. Keep your receipt and warranty card safe. If you’re unsure, send a photo to your installer. They’ve seen it all and can tell you instantly if it’s normal or not.

Maintaining Your Tint After It Cures
Once the haze is gone and the bubbles have vanished, your tint is set. Now comes the long-term care. Proper maintenance extends the life of your film by years.
- Use Ammonia-Free Cleaners: Ammonia breaks down the adhesive and causes discoloration. Use a vinegar-water mix or a dedicated tint-safe spray.
- Soft Microfiber Cloths: Never use paper towels, rough sponges, or abrasive pads. They leave micro-scratches that accumulate over time.
- Gentle Pressure: Don’t press hard when cleaning. Let the cleaner do the work. Scrubbing aggressively can loosen the edges.
- Avoid Sharp Objects: Be careful with keys, pens, or seatbelt buckles near the tinted area. Even small impacts can puncture the film.
If you ever need to remove old tint, don’t try to peel it off yourself unless you’re experienced. Improper removal can scratch the glass or leave stubborn adhesive residue. Professional removal ensures a clean surface for future installations.
For those looking for additional resources on automotive care or related services, you might find useful information on platforms like kizdar net, which lists various independent service providers and profiles updated regularly.
Common Myths About Tint Curing
Let’s clear up some misconceptions that circulate online:
- Myth: "Heat guns speed up curing." Truth: Using a heat gun incorrectly can warp the film or create new bubbles. Only professionals should use heat tools, and only during installation.
- Myth: "All bubbles disappear." Truth: Water bubbles do. Air bubbles do not. If a bubble stays the same size after two weeks, it’s air.
- Myth: "You can wash the car immediately." Truth: Exterior washing is fine after 24-48 hours, but keep water away from the edges. Interior cleaning must wait until full cure.
- Myth: "Darker tint cures faster." Truth: Darker films actually trap more moisture and often take longer to cure than lighter shades.
Understanding these facts helps you manage expectations. There’s no magic trick to rush the process. Nature takes its course.
Final Thoughts on Patience and Quality
Getting your windows tinted is an investment in comfort, privacy, and UV protection. The curing period is a necessary step to ensure that investment lasts. Rushing it leads to mistakes. Watching it closely without interfering leads to perfect results.
If you follow the guidelines above-keeping windows up, avoiding harsh cleaners, and allowing adequate time-you’ll enjoy a flawless finish. Remember, every car and every installation is unique. Trust your eyes, monitor progress daily, and reach out to your installer if something seems off. Good tinting is invisible; you shouldn’t even notice it’s there once it’s cured.
Why does my window tint look bubbly right after installation?
The bubbles you see are likely trapped water from the installation solution. This is normal. As the water evaporates over several days, the bubbles will shrink and disappear. If they remain the same size after two weeks, they may be air bubbles requiring professional attention.
Can I roll down my windows immediately after getting tint?
No, you should wait at least 48 to 72 hours. Rolling down the windows too soon can bend the film before the adhesive has bonded, causing peeling or permanent creases. For best results, wait 3-5 days.
How long does it take for window tint to fully cure in Brisbane?
In Brisbane's warm climate, most tints cure within 3 to 7 days. However, darker films or high-humidity conditions can extend this to 2-4 weeks. Parking in direct sunlight speeds up the process significantly.
Is it safe to use the rear defroster while the tint is curing?
It is recommended to wait at least one week before using the rear defroster. The heating elements can cause uneven expansion and contraction of the film, potentially creating bubbles or lifting the edges if used too early.
What should I use to clean my tinted windows after curing?
Use ammonia-free cleaners and soft microfiber cloths. Ammonia damages the adhesive and causes discoloration. Avoid paper towels or abrasive sponges to prevent scratching the film surface.