Refurbishing alloy wheels can breathe new life into your vehicle, making it look smarter and even enhancing the ride quality. Whether they have suffered from scuffs, scratches, or just wear and tear over time, restoring your wheels involves a detailed process that demands both care and technique.
Many people are curious about how long this process takes and what it truly involves. While it might seem straightforward, each wheel is unique in terms of the damage it may have endured and the complexity involved in its refurbishment. Gaining a clear understanding of the needed time and effort, along with insider tips, can help anyone set realistic expectations about the transformation journey.
- Understanding Wheel Refurbishment
- Timeframe for Refurbishing Alloy Wheels
- Step-by-step Refurbishment Process
- Tips for a Successful Refurbishment
- Common Mistakes to Avoid
Understanding Wheel Refurbishment
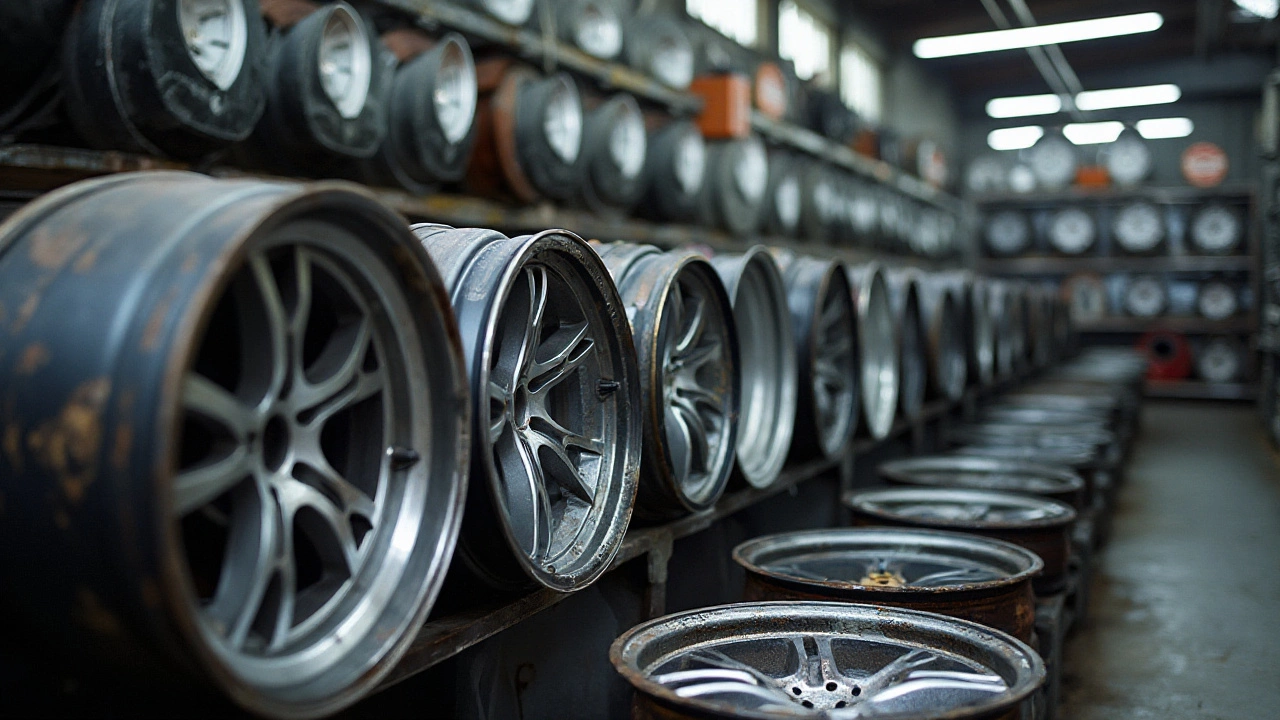
When diving into the world of alloy wheels, it's crucial to grasp what refurbishment entails. Alloy wheels are a popular choice for many vehicle owners due to their strength, lightweight nature, and aesthetic appeal. However, with time and use, they can fall prey to wear and tear, road salt corrosion, and dreaded curb rash. Refurbishing is the art of restoring these wheels to their original or even a custom-finished state, blending both cosmetic and functional repairs. It isn't just a touch-up paint job – it's an intricate process that involves technologies and techniques to mend, prime, and protect your wheels.
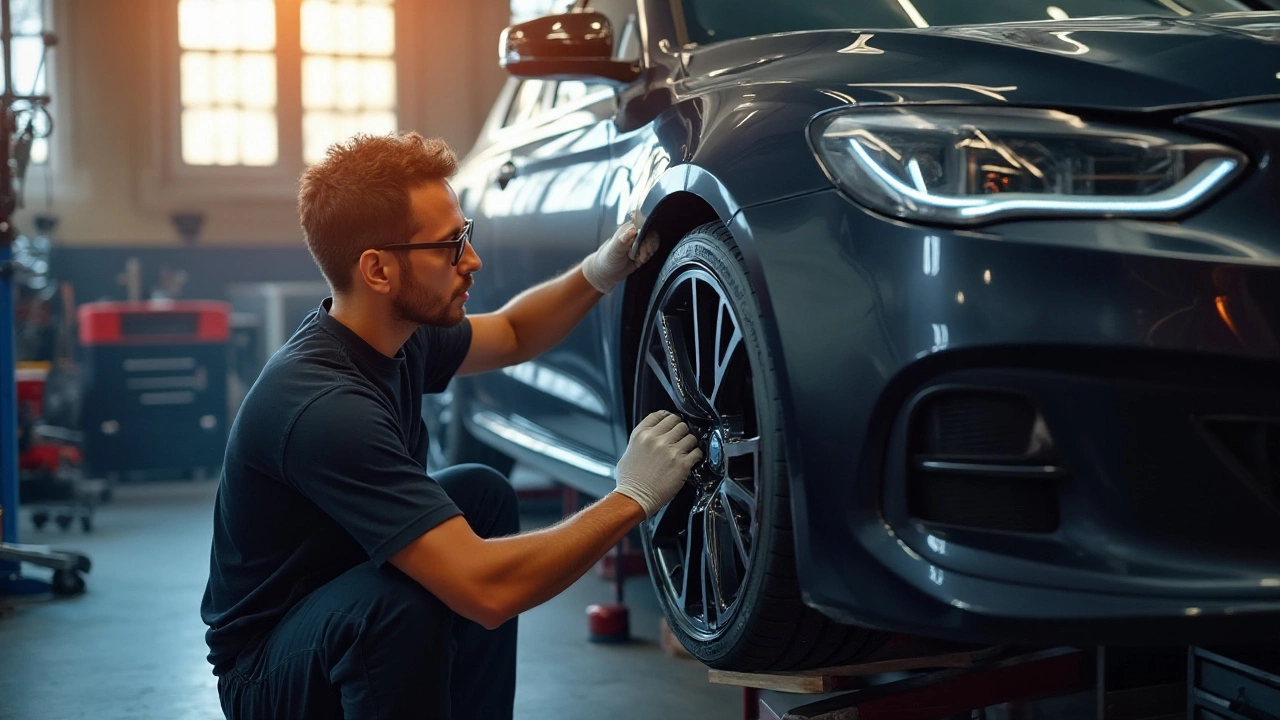
Initially, the process begins with a thorough assessment. This involves checking the depth of damage, be it surface scratches, dents from potholes, or oxidation patches. Often, the condition of the wheel dictates the method adopted; for instance, intricate designs might require more detailed work to preserve their aesthetic characteristics. After the assessment, a plan is laid out, ensuring that each step in the refurbishment process aligns with the goal of restoring the wheel's structural integrity and visual appeal. During this phase, the wheel is often unmounted to allow for a comprehensive examination.
A critical component of wheel repair is the preparation stage. This involves stripping the old paint, cleaning off dirt, and smoothing out any surface irregularities. High-quality refurbishment centers rely on professional-grade equipment, such as diamond cutting machines and hydraulic presses, which help achieve a finish akin to the wheel's original manufacture. Between these aggressive processes lies the careful work of filling minor gouges and addressing cracks for lasting strength, often involving welding and grinding techniques.
Once the initial repair work is completed, the wheel moves to the finishing stage. Here's where artistry and precision intersect, as the wheel is primed, painted, and sealed. The painting process allows for creativity; perhaps a car owner desires a fresh new color or a polished metallic finish to catch a rogue sunbeam. Sealing, subsequently, is a protective measure, encapsulating the wheel repair work done and fortifying it against future elements. This stage is crucial for enhancing the longevity of the wheel, adding additional layers against potential future abrasions and tarnishing.
"Investing in alloy wheel refurbishment not only saves money compared to new wheels but also delivers a custom touch for vehicle enthusiasts," says a respected auto industry analyst.
And did I mention it's a sustainable choice? By opting for refurbishment, rather than replacement, you're not just saving money but also reducing the environmental footprint associated with producing new wheels. Delve into this meticulous process, and you'll find the true essence of maintaining both style and substance. Isn't that what car maintenance is all about, after all?
Timeframe for Refurbishing Alloy Wheels
Restoring your alloy wheels to their former glory is a task that often intrigues car enthusiasts, especially when pondering the time it consumes. The duration to refurbish an alloy wheel can vary greatly, with typical estimates ranging from a few hours to a couple of days per wheel, depending on various factors. Primarily, the extent of the damage plays a pivotal role in determining whether your repair is a quick fix or a more elaborate undertaking. For a wheel that has merely encountered a light scuff, the process might be swift and simple. In contrast, a wheel grappling with severe scratches or corrosion might demand a more intensive session.
It's essential to consider what type of service you are aiming for when it comes to wheel repair. Mobile refurbishing services, which have gained popularity recently, can complete the job on the same day, conveniently at your doorstep. However, these might not be suitable for more intricate repairs which typically require a workshop's facilities. Workshops, equipped with specialized tools and experts, often handle the entire gamut—from fixing minor cosmetic blemishes to addressing structural integrity issues. A workshop refurbishment can span one to three days. This timeline accounts for the preparatory evaluations, the refurbishing process itself, and the final checks to ensure you've got wheels that are as good as new.
"Patience and attention to detail are crucial when refurbishing alloy wheels," mentions auto repair veteran Michael Carmichael.
"Ensuring each step is performed meticulously can mean the difference between a mediocre job and a rejuvenation that truly shines."This opinion underscores the idea that rushing through the refurbishment process could compromise the final outcome. Each stage, from the assessment to the finish, needs time and precision. Additionally, the type of finish you desire impacts the timeline. A polished finish versus a painted one might require different drying times and methods. It's not just about fixing what's broken but enhancing what remains.
On a lighter note, car enthusiasts or individuals who take a hands-on approach might enjoy attempting DIY refurbishing—though this is far more time-consuming. This route demands an understanding of the nuances involved and is often not recommended for those unfamiliar with car maintenance. So, while the DIY method might extend the timeline to several days or weeks, it grants you complete creative control over your car maintenance endeavors. In this scenario, assembling the right tools, prepping the wheels, cleaning, and applying layers of primer, paint, and lacquer to protect against future wear and tear, all contribute to a calendar-intensive hobby that rewards patience with satisfaction.
Step-by-step Refurbishment Process
When it comes to refurbishing alloy wheels, the process is both art and science, offering a transformative touch to often overlooked components of your vehicle. The first step in this journey begins with a thorough assessment of the wheel's current condition. This involves examining the extent of damage, whether the wheel has scratches, dents, or corrosion. It's vital to establish a clear understanding of the issues because each type of damage dictates a particular approach in the refurbishing process. The diagnosis will lead to selecting the appropriate tools and materials, which sets the foundation for a successful outcome.
The next significant phase involves cleaning and removing the tyres from the wheels. A meticulous cleaning ensures the removal of any grime, brake dust, or grease that has accumulated over time. This step could be labor-intensive but is essential because any residue left behind can interfere with the repair process. A specialized wheel cleaner is often recommended for the initial cleanse, followed by a more rigorous treatment with more abrasive materials if necessary. Removing the tyres can often be tricky, requiring tools like a tyre lever and a bead breaker to detach them safely and without inflicting further damage on the wheel.
Sanding and Resurfacing
The third step in the refurbishing journey is sanding and resurfacing, where experience and skill truly make a difference. Sanding transforms the wheel, smoothing out scratches, scuffs, and any surface irregularities. This step often involves several grades of sandpaper, starting from coarse and transitioning to finer grit for a smooth finish. Some professionals even boast the art of wet sanding, a technique that involves moistening the surface to achieve an even sleeker finish. Achieving a flawless surface is pivotal because even the smallest imperfection can become glaring after the application of paint and lacquer. It's here that patience is as crucial as precision since rushed sanding can easily lead to less-than-optimal results.
Priming and Painting
Priming and painting breathe new life into your alloy wheels, readying them for the next leg of their journey. Prime coats are essential, providing the paint something to adhere to and ensuring even coloring. After allowing the primer to dry thoroughly, the wheels are now set to receive their new color. During the painting process, the choice of paint can significantly impact the wheel's aesthetic. Many opt for traditional silver or chrome, but for those feeling adventurous, shades of black or custom colors can leave a lasting impression. Applying multiple thin coats is recommended as opposed to a heavy application. Each coat needs to dry entirely before adding the next, ensuring depth of color and avoiding any drips or inconsistencies in the finish.
According to a prominent wheel refurbishment expert, "The secret lies in patience and precision; shortcuts show up in the final product."
The Finishing Touch: Lacquering
The lacquer application provides not just a glossy finish but also a protective shield against future wear and tear. This stage is akin to giving your work of art a final protective glass cover. Whether you opt for a high-gloss or matte finish, the lacquer must be applied with even strokes and allowed to cure completely. The curing process could take up to twenty-four hours, necessary to establish a robust protective layer that defends against the elements and daily use. Many professionals advocate for an infrared curing process, which significantly reduces drying times, allowing you to have your wheels back on the road faster.
Inspecting the completed wheels marks the final step in the refurbishing cycle. This is a chance to confirm all steps were successful and that the desired results were achieved. Even professionals can sometimes miss minute defects, so this stage is about diligent inspection. Any areas requiring touch-up can be corrected before the wheels are reassembled with the tyres and mounted back on the vehicle, ready for new adventures. Following this comprehensive process ensures the revived beauty and durability of your refurbished alloy wheels.
Tips for a Successful Refurbishment
Refurbishing your alloy wheels to keep them in peak condition is an investment of time and care, rewarding you with durability and style. Before starting, consider assessing the wheels’ condition thoroughly. Damage like deep gouges or bent rims may need professional intervention. The first tip is to gather all necessary materials in advance, ensuring that sanding paper, filler, primer, paint, and clear coat are at the ready. Quality tools can make a remarkable difference in the finish, so investing in the right set is crucial. A standout fact for enthusiasts is that patience is your best ally during this process, as rushing through steps could compromise the integrity and aesthetic appeal of the wheel.
A controlled environment plays an integral role in success. Try to work in a dust-free, well-ventilated area to prevent unwanted particles from adhering to the surface during painting and drying processes. This not only protects the aesthetics but also extends the lifespan of the refurbished wheels. Beginners often underestimate the impact of temperature and humidity on the curing process of paint and clear coat. Thus, monitoring these factors can go a long way in achieving precise results. One widely respected industry expert once said,
"Paying attention to minor details can transform a refurbishment project from average to astounding."Always heed this advice, and do not overlook the importance of minute elements.
Implement a methodical approach when tackling each wheel. Begin by cleaning the wheel thoroughly to remove dirt, brake dust, and any surface contaminants. Follow this with sanding to smooth out surfaces and remove any oxide layers. The sanding step, while labor-intensive, primes the wheel for effective adhesion of primers and paints. Subsequently, applying a dedicated alloy filler can help address the imperfections, ensuring that the final outcome is as flawless as possible. Be meticulous with sanding in between filler applications to maintain a uniform surface before moving on to painting.
Perhaps the most satisfying step is painting, where the visual transformation truly starts to unfold. Applying thin coats of primer first helps safeguard the aluminum substrate. Be deliberate in your choice of paint, as this impacts both the appearance and resistance to ongoing environmental stresses such as UV rays and road debris. Remember to use even and consistent strokes to avoid paint runs and achieve a smooth finish. After the paint has dried, sealing it with multiple layers of clear coat adds a deep, glossy finish and protects the underlying layers from chipping and fading. Take extra time when applying the clear coat—patients here results in a final sheen that is both rich and robust.
While following steps meticulously is key, keeping an eye out for new technologies and materials can also enhance the refurbishment process. Innovations in wheel repair kits and eco-friendly paints offer more advanced options and improved safety. Depending on the scope of the refurbishment, it might also be wise to explore such new products. Another helpful reminder from the field: if this process seems daunting, wheel repair professionals often offer services that can expedite refurbishing, combining expert craftsmanship with industry-grade equipment. Investing in their services can be well worth it when striving for pristine results.

Common Mistakes to Avoid
When it comes to refurbishing alloy wheels, many enthusiasts make certain common mistakes that can lead to not only unsatisfactory results but could also damage the wheels further. One of the most prevalent errors is rushing through the preparation process. The importance of a meticulous cleaning and sanding routine cannot be overstated. It's not just about removing the obvious grime or scratches; you must ensure every nook is addressed. A rushed job might save time initially, but the consequences include poorer adhesion of paint or coatings, resulting in peeling and a surface that is far from smooth.
Another mistake individuals often make is skipping on primer application. While it might seem like an optional step, the primer is crucial for creating a stable base for the top coats. Choosing the right primer type, compatible with your alloy's material, also affects how well paint adheres, providing a longer-lasting refurbishment. Ignoring this step could cause the paint to flake quicker, exposing the underlying alloy to the elements sooner.
Without a doubt, the use of incorrect materials can also lead to disastrous results. The allure of cutting costs by using house paint on alloy wheels, or selecting substandard cleaning agents might be tempting. But the wrong paint can chip away under pressure or severely discolor under heat conditions that wheels are routinely subjected to. Employing car-specific paints and cleaning solutions is paramount as these are designed to withstand harsh environments.
"Attention to detail defines the line between perfection and mediocrity in wheel refurbishing," states Bryan Jenkins, motor enthusiast and expert. He emphasizes that using high-quality materials, even if more expensive initially, is what genuinely pays off in the long term.
Moreover, failing to protect your wheels post-refurbishment is another slip-up that many fall into. Just because they look new and shiny doesn’t mean they're impervious to damage. Applying a protective sealant is crucial. This layer acts as a barrier against dirt, brake dust, and the rogue pebble attack from the road. Neglecting this protective coat frequently results in you having to revisit cleaning and touching up spots far more than would otherwise be needed.
Finally, a common blunder is neglecting to let each stage cure fully before moving to the next. Every layer applied, be it primer, paint, or the sealing coat, requires adequate time to set. Jumping ahead impatiently can lead to smudging, uneven textures, and ultimately unsatisfactory finishes. Stick diligently to drying times recommended by manufacturers, allowing the product to perform as intended in ensuring the quality and durability your wheel repair requires.