Dashboard Style Recommender
Customize Your Dashboard Style
When you sit behind the wheel, the first thing you notice is the dashboard. A plain, dated surface can make even a great car feel cheap, while a well‑styled dash instantly upgrades the whole cabin vibe. Below is a step‑by‑step guide that shows how to transform a bland dashboard into a centerpiece you’ll love looking at every day.
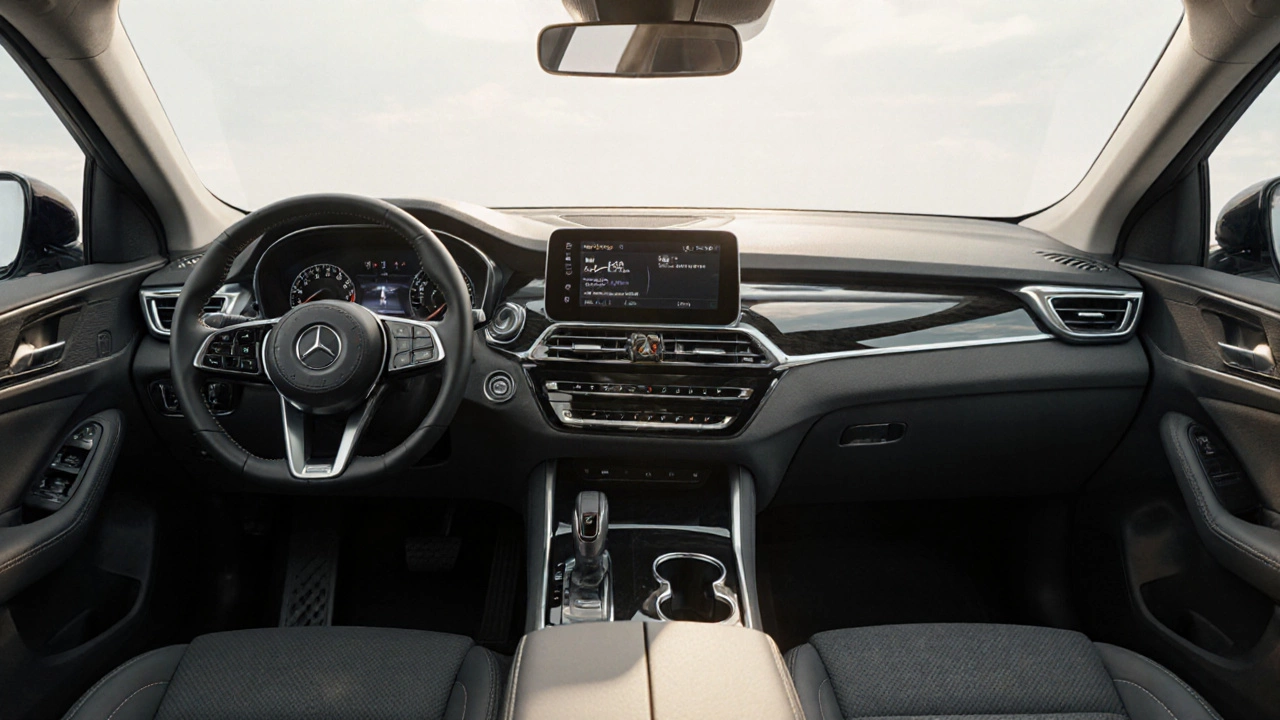
Car dashboard is the control panel that houses the instrument cluster, infotainment screen, climate controls and storage trays. It also forms the visual backdrop for everything the driver interacts with. A thoughtful dashboard styling plan touches materials, lighting, colours and accessories, creating a cohesive look that matches your personality and the car’s overall aesthetic.
Know Your Dashboard Anatomy
Before you buy any part, map out the main sections that can be customized:
- Instrument cluster - gauges, speedometer and tachometer.
- Center console - infotainment screen, navigation, speaker grilles.
- Surround trim - side panels, headliner edges, footwell trims.
- Storage niches - cup holders, glove box, courtesy lights.
Understanding where each piece lives helps you choose the right kits and avoid clashes. For example, a carbon‑fiber trim that looks great on the centre console may feel out of place on the side panels if the rest of the interior is leather.
Select a Style Theme
Pick a design language that guides all later choices. Three popular themes are:
- Modern minimalist - matte black, brushed aluminium, subtle lighting.
- Classic retro - wood veneer, chrome accents, warm amber lighting.
- Sporty performance - carbon fibre, red stitching, high‑contrast gauges.
Sticking to one theme prevents a mishmash look and makes budgeting easier. Decide early whether you want a bold statement or a subtle upgrade.
Material Upgrades: Choose What Feels Right
Materials are the most visible change. Below are the three most common upgrades, each with its own pros and cons.
Carbon fiber trim is a lightweight weave that adds a high‑tech, race‑car vibe. It’s typically supplied as pre‑cut pieces that snap or bolt onto the dash. The look is unmistakable, but the finish can show scratches if not sealed properly.
Wood veneer brings a warm, premium feel reminiscent of classic luxury cars. Thin sheets are glued over the original surface and finished with a protective lacquer. It can be pricey and may require professional installation to avoid gaps.
Aluminum accent offers a sleek, industrial look. Brushed or anodised finishes complement black or grey interiors nicely. Installation is usually a simple peel‑and‑stick process, but the edges need careful alignment.
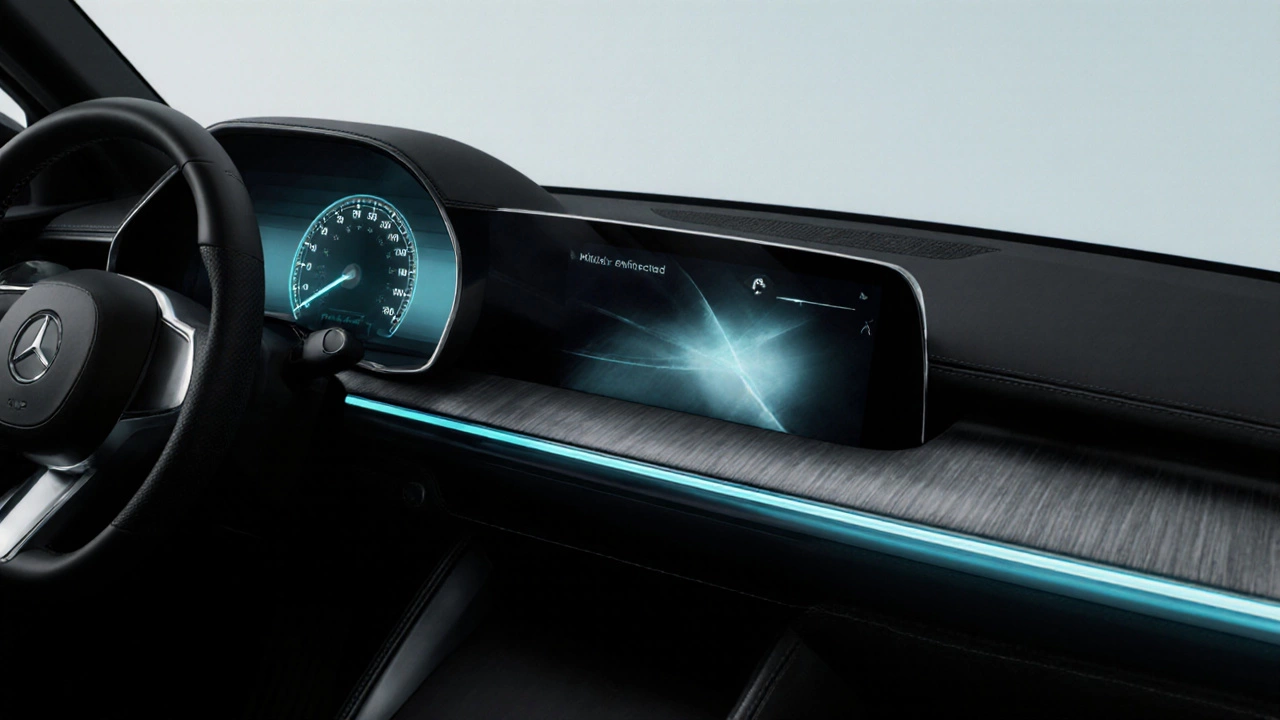
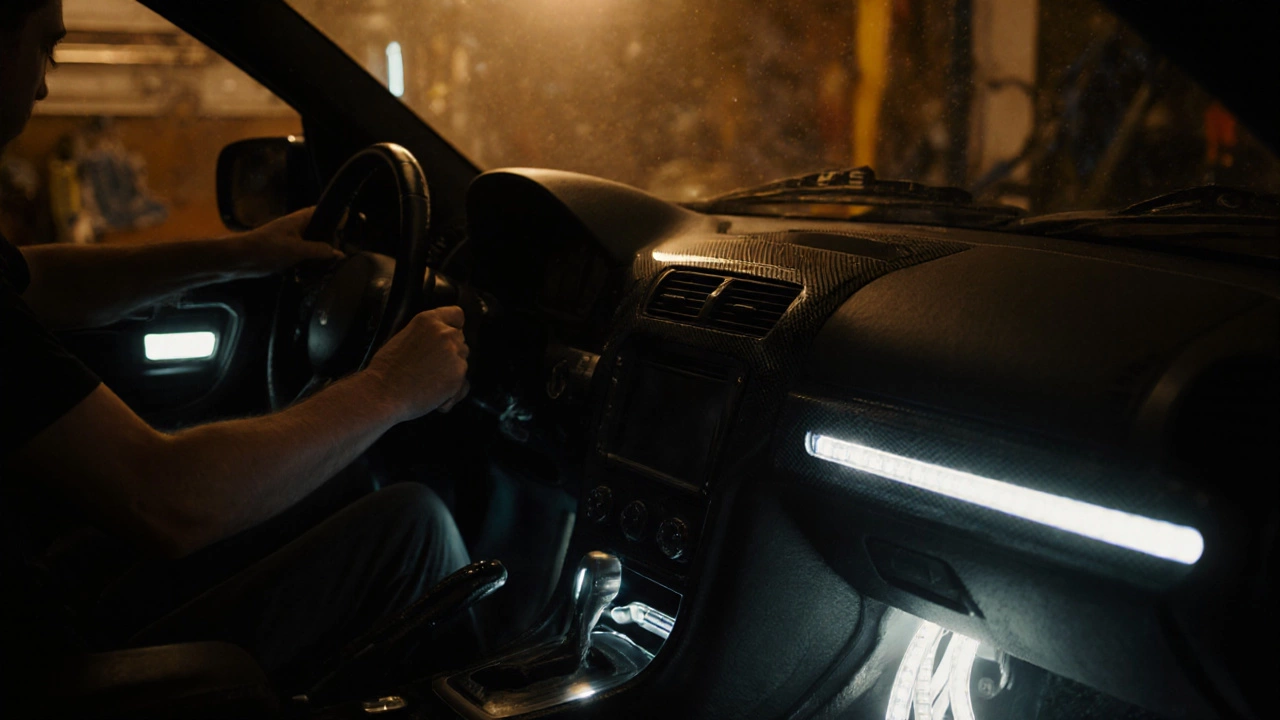
Lighting Upgrades: Set the Mood
Ambient lighting does more than help you find the controls at night - it defines the cabin’s atmosphere.
LED ambient lighting strips can be placed under the dash, in the footwell, or around the gauge cluster. Colour‑changing modules let you pick hues that match your theme, from soft blues for a modern look to amber for a retro feel. Most kits plug into the car’s 12V system and come with a dimmer switch.
Backlit gauges are another option. Swapping the stock gauge faces for illuminated versions adds depth and improves visibility. Some modern cars already support firmware‑based colour changes, but aftermarket kits usually require a separate controller.
Trim and Accessory Kits: The Finishing Touches
Once you have the main material and lighting settled, add small accessories that pull the look together.
- Dashboard trim kit - a complete set that includes side panels, console inserts and footwell covers, all in the same material.
- Stitched leather inserts - contrast stitching in a colour that matches your seat upholstery.
- Carbon‑fiber gauge bezels - replace the stock bezels for a uniform look.
- Custom shift‑lever boots - matching material to the dash ties the whole cockpit together.
These items are often sold as bundles, which saves time and ensures colour consistency.
DIY vs Professional Installation
Deciding whether to tackle the job yourself depends on your confidence, tools and the complexity of the chosen upgrades.
| Aspect | DIY | Professional |
|---|---|---|
| Cost | Lower - you only pay for parts. | Higher - labour adds 30‑50%. |
| Time | Varies - 4‑12 hours depending on skill. | Typically 2‑4 hours. |
| Quality | Good if you follow instructions carefully. | Factory‑level finish, warranty‑backed. |
| Risk | Potential for misalignment or damage. | Minimal - experienced hands. |
For simple peel‑and‑stick trims and LED strips, DIY is perfectly fine. Carbon fibre or wood veneer that requires bonding and edge‑finishing is better left to a shop that can clamp and cure the adhesive properly.
Maintenance and Longevity Tips
After the makeover, keep the dashboard looking fresh with these habits:
- Wipe down surfaces with a microfiber cloth and mild interior cleaner - avoid harsh solvents that can dull finishes.
- Protect LED strips with silicone sealant if they’re exposed to moisture.
- Check adhesive edges monthly; re‑apply a thin bead of automotive‑grade glue if you notice lifting.
- Use a UV‑protective spray on wood veneer to prevent fading from sunlight.
Regular care not only preserves aesthetics but also maintains resale value.
Quick Checklist Before You Start
- Define your style theme (modern, retro, sporty).
- Choose primary material - carbon fibre, wood, or aluminium.
- Select lighting - LED ambient strips or backlit gauges.
- Decide between DIY or professional install based on complexity.
- Gather tools: trim removal tool, adhesive, torque wrench, electrical connectors.
- Plan for maintenance: cleaning supplies, protective sprays.
Frequently Asked Questions
Can I mix different materials on the same dashboard?
Mixing is possible, but it should follow a clear visual hierarchy. For example, carbon fibre on the centre console paired with brushed aluminium side panels works if the colour palette is consistent. Avoid clashing textures that create visual noise.
Do LED ambient lights affect my car’s warranty?
Most manufacturers allow aftermarket lighting as long as it’s installed without cutting factory wiring. Using a plug‑in harness that taps into an existing 12V source keeps the warranty intact.
How much does a full carbon‑fiber dash kit cost?
A complete carbon‑fiber kit for a midsize sedan typically ranges from $800 to $1,500 AUD, depending on brand and whether you buy a DIY package or a pre‑installed set.
Is it safe to install lighting strips yourself?
Yes, as long as you follow the wiring diagram, use proper gauge wire, and secure connections with heat‑shrink tubing. Test the lights before finalising the adhesive.
What’s the best way to clean wood veneer on a dashboard?
Use a soft microfiber cloth lightly dampened with a wood‑safe cleaner, then apply a thin layer of UV‑protective polish. Avoid soaking the veneer, as excess moisture can lift the adhesive.